Adjustment layers are a nondestructive way to make edits to your photos. Adjustment layers allow you to make edits without damaging the original image and allow you to go back to make small adjustments as desired.
In the photo below, the background for this band student is distracting. I wanted to tone down the background by making it much darker.
I selected the Adjustment layer icon in the bottom of the Layers panel and selected the Exposure option. Then I made the entire photo darker by moving the slider to the left.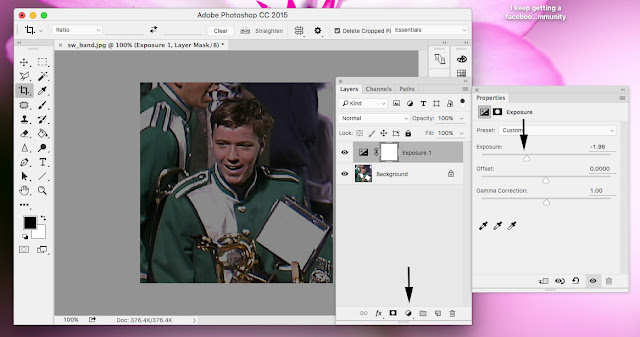
This also made the subject in the photo dark too. However, the beauty of Adjustment layers is that they automatically come with a mask. In the photo below, I selected the mask and painted in the mask with black to reveal the original parts of the photo I wanted in the layer below.
Note: You should always use a soft edged brush with edits and don't forget that you can change the opacity of what you are painting/revealing in the Options bar. Make sure you have the mask part of the icon selected when painting.

Since this is an Adjustment layer, I'm able to change or darken the exposure of the background even more if I change my mind. I selected the Adjustment icon in the layer and slide the Exposure to be even darker. The mask we created continues to allow the original exposure in the photo to show in the untouched layer below.
At any time, I could delete the Adjustment layer and start over. Or, continue to tweek my mask and exposure settings on this Adjustment layer that we have created.
That's the beauty of Adjustment layers. The original photo in the layer below (Background) is never damaged. And, I can continue to work on the adjustment layer as needed. Keep in mind, you'll need to save your document as a .psd file if you ever want to go back to work on your adjustment layer again.

No comments:
Post a Comment