The art history brush tool lets you paint with stylized strokes, using the source data from a specified history state or snapshot. By experimenting with different paint style, size, and tolerance options, you can simulate the texture of painting with different colors and artistic styles.
Like the history brush, the art history brush uses a specified history state as the source data. The history brush, however, paints by recreating the specified source data, while the art history brush uses that data along with the options you set to create different colors and artistic styles.
Open the photo that you want to make look like a painting
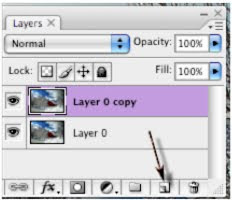
Duplicate the background layer by dragging the layer to the new layer icon (always work on a copy of an image)
Change foreground color to White
Edit – Fill – Normal – Foreground color (Fills the new layer with white)
Select the Art History Brush (has a curl around brush) and try various brush styles and sizes.
Depending on the resolution of your image here is my results when using the option palette setting “Tight Short” with a solid brush size of 9.
Want some real fun? Try various brush shapes when using the Art History Brush. Here I used a snowflake shaped brush and changed the size of the brush as I painted back in time.
Now there's an afternoon of fun with Photoshop. Enjoy!


No comments:
Post a Comment