 Have you ever wanted to replace a color in a photograph? It's not that hard to do. You could have some fun doing something like this.
I don't know how practical this is but, you could use the technique we are about to learn to enhance sky color etc. Or perhaps Uncle Earls shirt color just doesn't suite him. Let's take a look at how the "Replace Color" feature works in Photoshop and how I did this.
If you want to use the same image you can download it at one of my favorite free photograph sites. This giraffe is at http://www.sxc.hu/photo/345097.
Open your file in Photoshop then do the following:
- Duplicate your image layer (drag and drop the layer
 onto the new layer icon in the Layers panel) It's ALWAYS good practice to protect the original image.
 - On the duplicated layer go to Image - Adjustments - Replace Color (photo on right).
- Use the "+" eyedropper to select the color you want to replace on your photograph. Continue to click with the "+" eyedropper until you get all of the area you need. You'll see our image change in the background.
- Adjust the Hue slider to the color you want to change to. (Or, double click inside the Result color to specify your color replacement)
- Adjust the fuzziness to get more or less color replacement on edges while fine tuning the Saturation and Lightness. You could use the "-" eyedropper if you make a mistake to remove an area.
- Watch the changes on the image in the background on your open photo.
- Click OK when you are satisfied with the selection and color replacement.
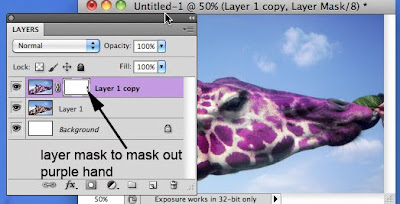
- The image is almost perfect except in this case, the hand which just barely shows on the far right edge of the photograph also turned purple. This is where the Layer Mask comes in.
- Add a Layer Mask to your new layer. (Click the layer mask icon in the bottom of the Layers Panel)
- Select the Layer Mask icon that appears to the right on your new layer and begin painting with a black soft edged brush to reveal the original hand in the layer below (see last photo).

Enjoy the color replacement tool in Photoshop!
No comments:
Post a Comment